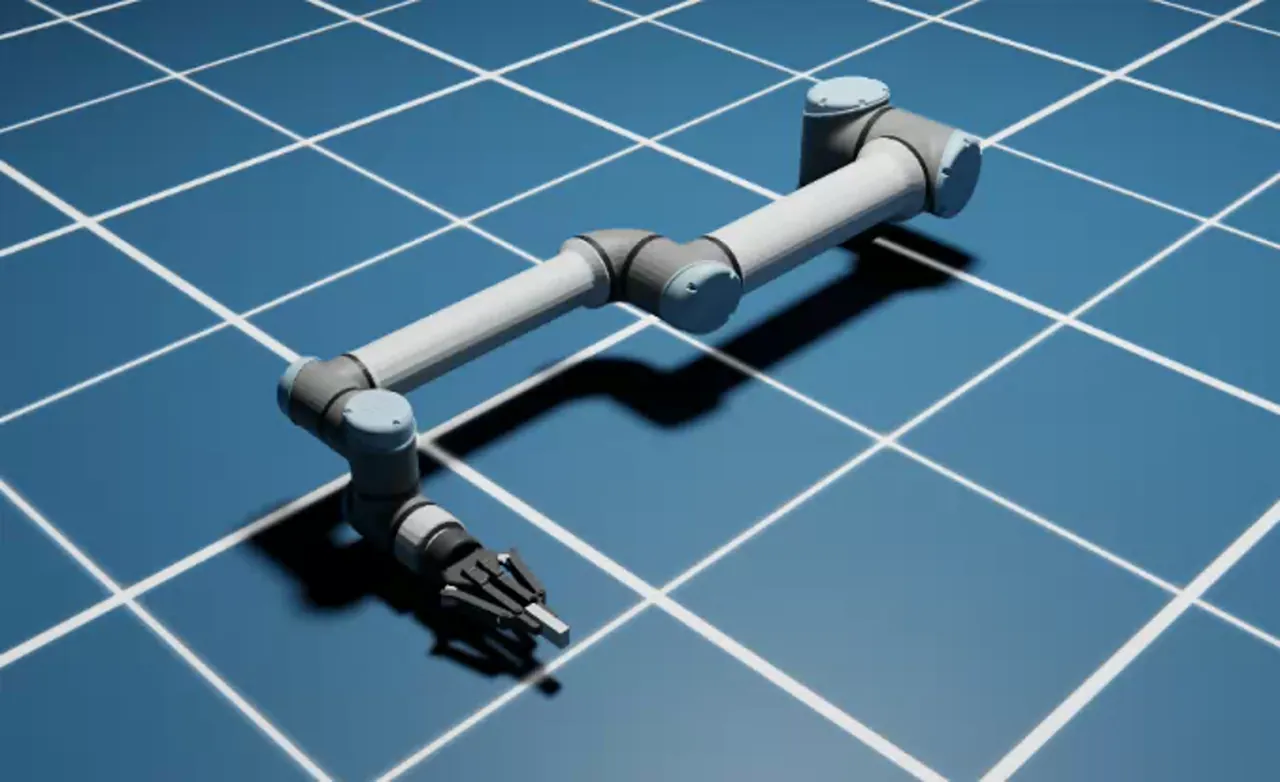
ピック&プレースの例
学習目標
このチュートリアルを修了すると、以下の内容を習得できます:
- グリッパーの開閉制御の方法
- Lula キネマティクスソルバー(逆運動学)によるターゲット追従
- RMPFlow によるモーション制御の設定と実行
- ピック&プレースタスクの実装
はじめに
前提条件
- チュートリアル 8: ロボット設定ファイルの生成 を完了していること
- チュートリアル 7〜8 で作成した以下のファイルが手元にあること:
- USD アセット(
ur_gripper.usd)— チュートリアル 7 で作成 - URDF ファイル(
ur_gripper.urdf)— チュートリアル 8 のステップ 1 で生成 - Lula ロボット記述ファイル(
ur10e.yaml)— チュートリアル 8 のステップ 5 で生成
- USD アセット(
所要時間
約 30〜40 分
概要
前回までのチュートリアルでは、UR10e ロボットアームと Robotiq 2F-140 グリッパーをセットアップし、キネマティクスソルバー用の設定ファイル(URDF、ロボット記述 YAML)を生成しました。
このチュートリアルでは、これらの成果物を活用して、自分のプロジェクトディレクトリに Python スクリプトを作成し、ロボットを制御します。以下の 5 つのステップで段階的に進めます:
- プロジェクトの準備 — ディレクトリ構成と設定ファイルの配置
- グリッパー制御 — グリッパーの開閉を制御する基礎
- IK ソルバーによるターゲット追従 — 逆運動学でエンドエフェクタを目標位置に移動
- RMPFlow によるターゲット追従 — 障害物回避を含むスムーズなモーション制御
- ピック&プレースタスク — すべてを組み合わせた物体の把持と配置
同梱サンプルも参考にできます
Isaac Sim には、このチュートリアルと同等の完成済みサンプルコードが同梱されています。行き詰まった場合や動作を確認したい場合は、以下のパスのスクリプトを参考にしてください:
実行方法:
ステップ 1:プロジェクトの準備
1-1. ディレクトリ構成
任意の場所にプロジェクトディレクトリを作成し、以下の構成でファイルを配置します。ここでは ur10e_pick_place というディレクトリ名を例として使用します:
ur10e_pick_place/
├── ur_gripper.usd                      # チュートリアル 7 で作成した USD アセットを Save As で配置
├── gripper_control.py                  # ステップ 2 で作成
├── follow_target_example.py            # ステップ 3 で作成
├── follow_target_example_rmpflow.py    # ステップ 4 で作成
├── pick_place_example.py               # ステップ 5 で作成
├── controllers/
│   ├── __init__.py                     # 空ファイル
│   ├── ik_solver.py                    # ステップ 3 で作成
│   ├── rmpflow.py                      # ステップ 4 で作成
│   └── pick_place.py                   # ステップ 5 で作成
├── tasks/
│   ├── __init__.py                     # 空ファイル
│   ├── follow_target.py                # ステップ 3 で作成
│   └── pick_place.py                   # ステップ 5 で作成
└── rmpflow/
    ├── ur10e.yaml                       # チュートリアル 8 で生成(Lula ロボット記述ファイル)したファイルをコピー
    ├── ur_gripper.urdf                   # チュートリアル 8 で生成したファイルをコピー
    └── ur10e_rmpflow_common.yaml       # ステップ 4 で作成
1-2. USD アセットの配置
チュートリアル 7 で作成した ur_gripper.usd は、Physics Layer やメッシュファイルなどを相対パスで参照する構成になっています。そのままコピーすると参照先のファイルが見つからず、ロボットが正しく読み込まれません。
そこで、Isaac Sim の Save As 機能を使い、参照パスが正しく解決される新しい USD ファイルとしてプロジェクトディレクトリに保存します:
- Isaac Sim で
ur_gripper.usdを開く -
Stage パネルで以下のジョイントの Target Position を設定する:
ジョイント Target Position 説明 shoulder_lift_joint-10.0deg肩を少し上向きに傾ける elbow_joint10.0deg肘を少し上向きに曲げる 

これにより、シミュレーション開始時にロボットの肘が地面方向に曲がっていくことを防ぎます。
地面の動作計画への組み込みについて
RMPFlow の API には
rmpflow.add_ground_plane()という、地面を衝突ワールドに追加してモーションプランナーに自動回避させるメソッドが存在します。しかし、Isaac Sim 5.1.0 の時点ではこの API を使用しても期待通りの地面回避動作が得られないことが確認されています。そのため、このチュートリアルでは初期ジョイント角度の設定によって対処しています。 -
メニューから File > Save As... を選択
-
保存先をプロジェクトディレクトリ(
ur10e_pick_place/)に指定し、ファイル名をur_gripper.usdとして保存
Save As で保存すると、参照先ファイル(Physics Layer など)への相対パスが新しい保存先に合わせて自動的に更新されます。
ファイルを単純にコピーしないでください
ur_gripper.usd をファイルマネージャやコマンドでコピーすると、内部の相対パス参照が壊れてロボットのプリム階層が読み込まれず、以下のようなエラーが発生します:
1-3. その他のファイルの配置
チュートリアル 8 で作成した以下のファイルをプロジェクトディレクトリにコピーします:
ur10e.yaml— Lula Robot Description Editor からエクスポートしたロボット記述ファイル(rmpflow/に配置)ur_gripper.urdf— USD to URDF Exporter で生成した URDF ファイル(rmpflow/に配置)
mkdir -p ur10e_pick_place/rmpflow
mkdir -p ur10e_pick_place/controllers
mkdir -p ur10e_pick_place/tasks
touch ur10e_pick_place/controllers/__init__.py
touch ur10e_pick_place/tasks/__init__.py

# チュートリアル 8 で作成したファイルをコピー(パスは環境に合わせて変更)
cp /path/to/your/ur10e.yaml ur10e_pick_place/rmpflow/
cp /path/to/your/ur_gripper.urdf ur10e_pick_place/rmpflow/
New-Item -ItemType Directory -Force ur10e_pick_place\rmpflow
New-Item -ItemType Directory -Force ur10e_pick_place\controllers
New-Item -ItemType Directory -Force ur10e_pick_place\tasks
New-Item -ItemType File -Force ur10e_pick_place\controllers\__init__.py
New-Item -ItemType File -Force ur10e_pick_place\tasks\__init__.py

# チュートリアル 8 で作成したファイルをコピー(パスは環境に合わせて変更)
Copy-Item C:\path\to\your\ur10e.yaml ur10e_pick_place\rmpflow\
Copy-Item C:\path\to\your\ur_gripper.urdf ur10e_pick_place\rmpflow\
以降のコード例について
以降のコード例では、os.path.dirname(__file__) を使って現在のスクリプトからの相対パスで ur_gripper.usd を参照します。USD アセットをプロジェクトルートに配置しておくことで、パスが固定され環境に依存しなくなります。
1-4. スクリプトの実行方法
このチュートリアルのスクリプトは、Isaac Sim の Python 環境で以下のように実行します:
ステップ 2:グリッパー制御
最初のステップとして、グリッパーの開閉制御を学びます。これはマニピュレーションタスクの最も基本的な操作です。
2-1. スクリプトの作成
gripper_control.py を作成します:
from isaacsim import SimulationApp

simulation_app = SimulationApp({"headless": False})

import os

import numpy as np
from isaacsim.core.api import World
from isaacsim.core.utils.stage import add_reference_to_stage
from isaacsim.core.utils.types import ArticulationAction
from isaacsim.robot.manipulators import SingleManipulator
from isaacsim.robot.manipulators.grippers import ParallelGripper

my_world = World(stage_units_in_meters=1.0)

# --- アセットの読み込み ---
asset_path = os.path.join(os.path.dirname(os.path.abspath(__file__)), "ur_gripper.usd")
add_reference_to_stage(usd_path=asset_path, prim_path="/ur10e")

# --- デバッグ: ステージのプリム階層を表示 ---
import omni.usd
stage = omni.usd.get_context().get_stage()
for prim in stage.Traverse():
    print(prim.GetPath())

# --- グリッパーの定義 ---
gripper = ParallelGripper(
    end_effector_prim_path="/ur10e/ee_link/robotiq_140_base_link",
    # 既存アセットを利用する場合
    # end_effector_prim_path="/ur10e/ee_link/robotiq_arg2f_base_link",
    joint_prim_names=["finger_joint"],
    joint_opened_positions=np.array([0]),
    joint_closed_positions=np.array([40]),
    action_deltas=np.array([-40]),
    use_mimic_joints=True,
)

# --- マニピュレータの定義 ---
my_ur10 = my_world.scene.add(
    SingleManipulator(
        prim_path="/ur10e",
        name="ur10_robot",
        end_effector_prim_path="/ur10e/ee_link/robotiq_140_base_link",
        # 既存アセットを利用する場合
        # end_effector_prim_path="/ur10e/ee_link/robotiq_arg2f_base_link",
        gripper=gripper,
    )
)

my_world.scene.add_default_ground_plane()
my_world.reset()

# --- シミュレーションループ ---
i = 0
reset_needed = False
while simulation_app.is_running():
    my_world.step(render=True)
    if my_world.is_stopped() and not reset_needed:
        reset_needed = True
    if my_world.is_playing():
        if reset_needed:
            my_world.reset()
            reset_needed = False
        i += 1
        gripper_positions = my_ur10.gripper.get_joint_positions()
        if i < 400:
            # グリッパーをゆっくり閉じる
            my_ur10.gripper.apply_action(
                ArticulationAction(joint_positions=[gripper_positions[0] + 0.1])
            )
        if i > 400:
            # グリッパーをゆっくり開く
            my_ur10.gripper.apply_action(
                ArticulationAction(joint_positions=[gripper_positions[0] - 0.1])
            )
        if i == 800:
            i = 0

simulation_app.close()
2-2. コードの解説
SimulationApp の初期化
すべての Isaac Sim スタンドアロンスクリプトは SimulationApp の初期化から始まります。headless=False で GUI を表示します。
インポート順序に注意
SimulationApp の初期化は、他の Isaac Sim モジュールをインポートする前に行う必要があります。これは Isaac Sim のランタイムが SimulationApp の初期化時にセットアップされるためです。
ParallelGripper の設定
gripper = ParallelGripper(
end_effector_prim_path="/ur10e/ee_link/robotiq_140_base_link",
# 既存アセットを利用する場合
# end_effector_prim_path="/ur10e/ee_link/robotiq_arg2f_base_link",
joint_prim_names=["finger_joint"],
joint_opened_positions=np.array([0]),
joint_closed_positions=np.array([40]),
action_deltas=np.array([-40]),
use_mimic_joints=True,
)
ParallelGripper クラスは平行グリッパー(2本の指が同時に開閉するタイプ)を制御するためのクラスです。
| パラメータ | 値 | 説明 |
|---|---|---|
end_effector_prim_path |
/ur10e/ee_link/robotiq_arg2f_base_link |
エンドエフェクタのプリムパス |
joint_prim_names |
["finger_joint"] |
制御対象のジョイント名 |
joint_opened_positions |
[0] |
グリッパーが開いた状態のジョイント位置 |
joint_closed_positions |
[40] |
グリッパーが閉じた状態のジョイント位置 |
action_deltas |
[-40] |
開閉動作時のジョイント位置の変化量 |
use_mimic_joints |
True |
Mimic ジョイントを使用する(片方の指を動かすと反対側も連動) |
ジョイント位置の値について
joint_opened_positions=0 と joint_closed_positions=40 の値は、チュートリアル 7 で設定した Robotiq 2F-140 グリッパーのジョイント可動範囲に基づいています。Physics Inspector で確認した値を使用してください。
グリッパーの開閉ループ
i += 1
gripper_positions = my_ur10.gripper.get_joint_positions()
if i < 400:
my_ur10.gripper.apply_action(
ArticulationAction(joint_positions=[gripper_positions[0] + 0.1])
)
if i > 400:
my_ur10.gripper.apply_action(
ArticulationAction(joint_positions=[gripper_positions[0] - 0.1])
)
if i == 800:
i = 0
800 ステップを 1 サイクルとして以下を繰り返します:
- ステップ 1〜400: 現在のジョイント位置に
+0.1ずつ加算してグリッパーを閉じる - ステップ 401〜800: 現在のジョイント位置に
-0.1ずつ減算してグリッパーを開く
各ステップでわずかな変化量を適用することで、グリッパーがゆっくりと滑らかに開閉します。
ステップ 3:Lula キネマティクスソルバーによるターゲット追従
次に、逆運動学(IK: Inverse Kinematics) を使って、エンドエフェクタを目標位置に移動させる方法を学びます。
逆運動学(IK)とは
逆運動学とは、エンドエフェクタの目標位置・姿勢から、各ジョイントの角度を逆算する手法です。「手先をこの位置に持っていきたい」という目標に対して、各関節をどの角度にすればよいかを計算します。
このステップでは 3 つのファイルを作成します:
controllers/ik_solver.py— IK ソルバーコントローラtasks/follow_target.py— ターゲット追従タスクの定義follow_target_example.py— 実行スクリプト
3-1. IK ソルバーコントローラの作成
controllers/ik_solver.py を作成します。このコントローラは、チュートリアル 8 で生成した設定ファイルを使って逆運動学を解きます。
import os
from typing import Optional
from isaacsim.core.prims import Articulation
from isaacsim.robot_motion.motion_generation import (
ArticulationKinematicsSolver,
LulaKinematicsSolver,
)
class KinematicsSolver(ArticulationKinematicsSolver):
def __init__(
self,
robot_articulation: Articulation,
end_effector_frame_name: Optional[str] = None,
) -> None:
self._kinematics = LulaKinematicsSolver(
robot_description_path=os.path.join(
os.path.dirname(__file__), "../rmpflow/ur10e.yaml"
),
urdf_path=os.path.join(
os.path.dirname(__file__), "../rmpflow/ur_gripper.urdf"
),
)
if end_effector_frame_name is None:
end_effector_frame_name = "robotiq_140_base_link"
# 既存アセットを利用する場合
# end_effector_frame_name = "ee_link_robotiq_arg2f_base_link"
ArticulationKinematicsSolver.__init__(
self, robot_articulation, self._kinematics, end_effector_frame_name
)
return
ポイント:
LulaKinematicsSolverにステップ 1 で配置したur10e.yamlとur_gripper.urdfのパスを渡しますend_effector_frame_nameはエンドエフェクタのフレーム名です。URDF 内のリンク名と一致する必要があります(例:robotiq_140_base_link)。URDF のリンク名は USD のプリムパスとは異なる場合があるため、ur_gripper.urdfを確認してください
3-2. ターゲット追従タスクの作成
tasks/follow_target.py を作成します。このタスクは、ロボットとターゲットをシーンに配置し、観測値を提供します。
import os
from typing import Optional
import isaacsim.core.api.tasks as tasks
import numpy as np
from isaacsim.core.utils.stage import add_reference_to_stage
from isaacsim.robot.manipulators.grippers import ParallelGripper
from isaacsim.robot.manipulators.manipulators import SingleManipulator
class FollowTarget(tasks.FollowTarget):
def __init__(
self,
name: str = "ur10e_follow_target",
target_prim_path: Optional[str] = None,
target_name: Optional[str] = None,
target_position: Optional[np.ndarray] = None,
target_orientation: Optional[np.ndarray] = None,
offset: Optional[np.ndarray] = None,
) -> None:
tasks.FollowTarget.__init__(
self,
name=name,
target_prim_path=target_prim_path,
target_name=target_name,
target_position=target_position,
target_orientation=target_orientation,
offset=offset,
)
return
def set_robot(self) -> SingleManipulator:
# tasks/ の親ディレクトリ(プロジェクトルート)にある ur_gripper.usd を参照
asset_path = os.path.join(os.path.dirname(__file__), "..", "ur_gripper.usd")
add_reference_to_stage(usd_path=asset_path, prim_path="/ur10e")
gripper = ParallelGripper(
end_effector_prim_path="/ur10e/ee_link/robotiq_140_base_link",
# 既存アセットを利用する場合
# end_effector_prim_path="/ur10e/ee_link/robotiq_arg2f_base_link",
joint_prim_names=["finger_joint"],
joint_opened_positions=np.array([0]),
joint_closed_positions=np.array([40]),
action_deltas=np.array([-40]),
use_mimic_joints=True,
)
manipulator = SingleManipulator(
prim_path="/ur10e",
name="ur10_robot",
end_effector_prim_path="/ur10e/ee_link/robotiq_140_base_link",
# 既存アセットを利用する場合
# end_effector_prim_path="/ur10e/ee_link/robotiq_arg2f_base_link",
gripper=gripper,
)
return manipulator
ポイント:
- Isaac Sim のベースクラス
tasks.FollowTargetを継承しています set_robot()メソッドでロボットの初期化を行います。ベースクラスがこのメソッドを呼び出してロボットをシーンに追加します- グリッパーの設定はステップ 2 と同じです
3-3. ターゲット追従スクリプトの作成
follow_target_example.py を作成します:
from isaacsim import SimulationApp
simulation_app = SimulationApp({"headless": False})
import numpy as np
from controllers.ik_solver import KinematicsSolver
from isaacsim.core.api import World
from tasks.follow_target import FollowTarget
my_world = World(stage_units_in_meters=1.0)
# ターゲット追従タスクの初期化(ターゲットの初期位置を指定)
my_task = FollowTarget(
name="ur10e_follow_target",
target_position=np.array([0.5, 0, 0.5]),
)
my_world.add_task(my_task)
my_world.reset()
# タスクからロボットとターゲットの情報を取得
task_params = my_world.get_task("ur10e_follow_target").get_params()
target_name = task_params["target_name"]["value"]
ur10e_name = task_params["robot_name"]["value"]
my_ur10e = my_world.scene.get_object(ur10e_name)
# IK ソルバーの初期化
ik_solver = KinematicsSolver(my_ur10e)
articulation_controller = my_ur10e.get_articulation_controller()
# シミュレーションループ
while simulation_app.is_running():
my_world.step(render=True)
if my_world.is_playing():
if my_world.current_time_step_index == 0:
my_world.reset()
# ターゲットの位置・姿勢を観測
observations = my_world.get_observations()
# IK ソルバーでジョイント角度を計算
actions, succ = ik_solver.compute_inverse_kinematics(
target_position=observations[target_name]["position"],
target_orientation=observations[target_name]["orientation"],
)
if succ:
articulation_controller.apply_action(actions)
else:
print("IK did not converge to a solution. No action is being taken.")
simulation_app.close()
処理の流れ
-
ワールドとタスクの初期化:
Worldを作成し、FollowTargetタスクを追加します。ターゲットの初期位置を[0.5, 0, 0.5]に設定します。 -
IK ソルバーの初期化:
KinematicsSolverを作成し、ロボットのアーティキュレーションコントローラを取得します。 -
シミュレーションループ: 毎ステップで以下を実行します:
- ターゲットの現在位置・姿勢を観測
- IK ソルバーで目標位置に到達するためのジョイント角度を計算
- 計算が成功した場合、ジョイント角度をロボットに適用
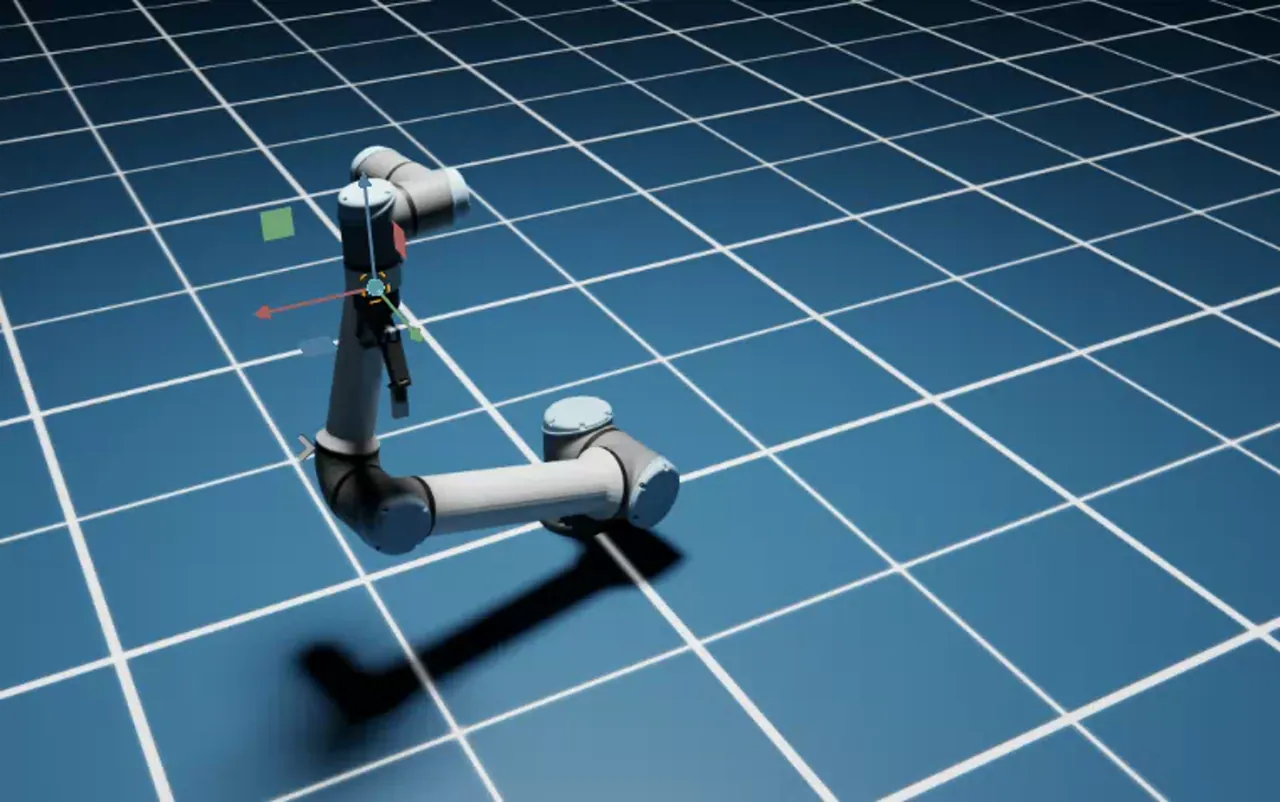
シミュレーション中にターゲットを動かす
シミュレーションの実行中に、ビューポート上でターゲット(小さなキューブ)をドラッグして移動できます。エンドエフェクタがリアルタイムにターゲットを追従する様子を確認してください。
ステップ 4:RMPFlow によるターゲット追従
IK ソルバーは目標位置への到達が可能ですが、障害物の回避や関節の制限を考慮した滑らかなモーション生成は行いません。RMPFlow(Riemannian Motion Policy Flow) はこれらを統合的に扱うモーションプランニングフレームワークです。
RMPFlow とは
RMPFlow は、複数の制御目標(ターゲットへの到達、障害物の回避、関節制限の遵守など)をリーマン幾何学の枠組みで統合するモーションプランニングアルゴリズムです。各目標を独立した「ポリシー」として定義し、それらを自動的に合成して滑らかな動作を生成します。
このステップでは 3 つのファイルを作成します:
rmpflow/ur10e_rmpflow_common.yaml— RMPFlow の設定ファイルcontrollers/rmpflow.py— RMPFlow コントローラfollow_target_example_rmpflow.py— 実行スクリプト
4-1. RMPFlow 設定ファイルの作成
rmpflow/ur10e_rmpflow_common.yaml を作成します。このファイルは RMPFlow のモーションポリシーの動作パラメータを定義します:
joint_limit_buffers: [.01, .01, .01, .01, .01, .01]
rmp_params:
cspace_target_rmp:
metric_scalar: 50.
position_gain: 100.
damping_gain: 50.
robust_position_term_thresh: .5
inertia: 1.
cspace_trajectory_rmp:
p_gain: 100.
d_gain: 10.
ff_gain: .25
weight: 50.
cspace_affine_rmp:
final_handover_time_std_dev: .25
weight: 2000.
joint_limit_rmp:
metric_scalar: 1000.
metric_length_scale: .01
metric_exploder_eps: 1e-3
metric_velocity_gate_length_scale: .01
accel_damper_gain: 200.
accel_potential_gain: 1.
accel_potential_exploder_length_scale: .1
accel_potential_exploder_eps: 1e-2
joint_velocity_cap_rmp:
max_velocity: 1.
velocity_damping_region: .3
damping_gain: 1000.0
metric_weight: 100.
target_rmp:
accel_p_gain: 30.
accel_d_gain: 85.
accel_norm_eps: .075
metric_alpha_length_scale: .05
min_metric_alpha: .01
max_metric_scalar: 10000
min_metric_scalar: 2500
proximity_metric_boost_scalar: 20.
proximity_metric_boost_length_scale: .02
xi_estimator_gate_std_dev: 20000.
accept_user_weights: false
axis_target_rmp:
accel_p_gain: 210.
accel_d_gain: 60.
metric_scalar: 10
proximity_metric_boost_scalar: 3000.
proximity_metric_boost_length_scale: .08
xi_estimator_gate_std_dev: 20000.
accept_user_weights: false
collision_rmp:
damping_gain: 50.
damping_std_dev: .04
damping_robustness_eps: 1e-2
damping_velocity_gate_length_scale: .01
repulsion_gain: 800.
repulsion_std_dev: .01
metric_modulation_radius: .5
metric_scalar: 10000.
metric_exploder_std_dev: .02
metric_exploder_eps: .001
damping_rmp:
accel_d_gain: 30.
metric_scalar: 50.
inertia: 100.
canonical_resolve:
max_acceleration_norm: 50.
projection_tolerance: .01
verbose: false
body_cylinders:
- name: base
pt1: [0,0,.10]
pt2: [0,0,0.]
radius: .2
body_collision_controllers:
- name: robotiq_140_base_link
radius: .05
主要パラメータ:
| セクション | 説明 |
|---|---|
joint_limit_buffers |
各ジョイントの関節制限のバッファ値(制限値から少し余裕を持たせる) |
cspace_target_rmp |
コンフィギュレーション空間でのターゲット追従に関するゲイン |
joint_limit_rmp |
関節制限を超えないようにする RMP のパラメータ |
joint_velocity_cap_rmp |
関節速度の上限を制御するパラメータ(max_velocity: 1.) |
target_rmp |
タスク空間(エンドエフェクタ位置)でのターゲット追従パラメータ |
collision_rmp |
障害物回避のためのパラメータ(repulsion_gain で反発力を制御) |
body_cylinders |
ロボットのベース部分を円柱で近似したコリジョン形状 |
body_collision_controllers |
エンドエフェクタのコリジョン半径 |
パラメータの調整
多くのパラメータはデフォルト値で十分に動作しますが、ロボットの動きが遅すぎる/速すぎる場合は target_rmp の accel_p_gain や accel_d_gain、joint_velocity_cap_rmp の max_velocity を調整してみてください。
4-2. RMPFlow コントローラの作成
controllers/rmpflow.py を作成します:
import os
import isaacsim.robot_motion.motion_generation as mg
from isaacsim.core.prims import Articulation
class RMPFlowController(mg.MotionPolicyController):
def __init__(
self,
name: str,
robot_articulation: Articulation,
physics_dt: float = 1.0 / 60.0,
) -> None:
# RMPFlow モーションポリシーの初期化
self.rmpflow = mg.lula.motion_policies.RmpFlow(
robot_description_path=os.path.join(
os.path.dirname(__file__), "../rmpflow/ur10e.yaml"
),
rmpflow_config_path=os.path.join(
os.path.dirname(__file__), "../rmpflow/ur10e_rmpflow_common.yaml"
),
urdf_path=os.path.join(
os.path.dirname(__file__), "../rmpflow/ur_gripper.urdf"
),
end_effector_frame_name="robotiq_140_base_link",
maximum_substep_size=0.00334,
)
# アーティキュレーションモーションポリシーでラップ
self.articulation_rmp = mg.ArticulationMotionPolicy(
robot_articulation, self.rmpflow, physics_dt
)
mg.MotionPolicyController.__init__(
self, name=name, articulation_motion_policy=self.articulation_rmp
)
# ロボットのベースポーズを設定
self._default_position, self._default_orientation = (
self._articulation_motion_policy._robot_articulation.get_world_pose()
)
self._motion_policy.set_robot_base_pose(
robot_position=self._default_position,
robot_orientation=self._default_orientation,
)
return
def reset(self):
mg.MotionPolicyController.reset(self)
self._motion_policy.set_robot_base_pose(
robot_position=self._default_position,
robot_orientation=self._default_orientation,
)
ポイント:
| 要素 | 説明 |
|---|---|
RmpFlow(...) |
チュートリアル 8 で生成した設定ファイルと上で作成した YAML 設定を読み込む |
maximum_substep_size |
RMPFlow 内部のサブステップの最大時間幅(秒)。小さい値ほど精度が上がるが計算コストが増加 |
ArticulationMotionPolicy |
RmpFlow ポリシーをアーティキュレーション(ロボットのジョイント群)に接続するラッパー |
set_robot_base_pose(...) |
ロボットのベース位置・姿勢を設定。ロボットが原点以外に配置されている場合に重要 |
4-3. RMPFlow ターゲット追従スクリプトの作成
follow_target_example_rmpflow.py を作成します:
from isaacsim import SimulationApp
simulation_app = SimulationApp({"headless": False})
import numpy as np
from controllers.rmpflow import RMPFlowController
from isaacsim.core.api import World
from tasks.follow_target import FollowTarget
my_world = World(stage_units_in_meters=1.0)
# ターゲット追従タスクの初期化
my_task = FollowTarget(
name="ur10e_follow_target",
target_position=np.array([0.5, 0, 0.5]),
)
my_world.add_task(my_task)
my_world.reset()
task_params = my_world.get_task("ur10e_follow_target").get_params()
target_name = task_params["target_name"]["value"]
ur10e_name = task_params["robot_name"]["value"]
my_ur10e = my_world.scene.get_object(ur10e_name)
articulation_controller = my_ur10e.get_articulation_controller()
# RMPFlow コントローラの初期化
my_controller = RMPFlowController(
name="target_follower_controller",
robot_articulation=my_ur10e,
)
my_controller.reset()
# シミュレーションループ
while simulation_app.is_running():
my_world.step(render=True)
if my_world.is_playing():
if my_world.current_time_step_index == 0:
my_world.reset()
my_controller.reset()
observations = my_world.get_observations()
# RMPFlow でアクションを計算
actions = my_controller.forward(
target_end_effector_position=observations[target_name]["position"],
target_end_effector_orientation=observations[target_name]["orientation"],
)
articulation_controller.apply_action(actions)
simulation_app.close()
4-4. IK ソルバーとの違い
| 項目 | IK ソルバー(ステップ 3) | RMPFlow(ステップ 4) |
|---|---|---|
| 計算方法 | 逆運動学でジョイント角度を直接計算 | モーションポリシーで速度指令を生成 |
| 障害物回避 | なし | あり(collision_rmp で設定) |
| 関節制限 | 基本的な制限のみ | バッファ付きの制限(joint_limit_rmp) |
| 動作の滑らかさ | 瞬間的に目標角度に移動 | 滑らかな軌道で目標に到達 |
| 収束失敗 | 解が見つからない場合がある | 常にアクションを出力(到達不能でも安全に停止) |
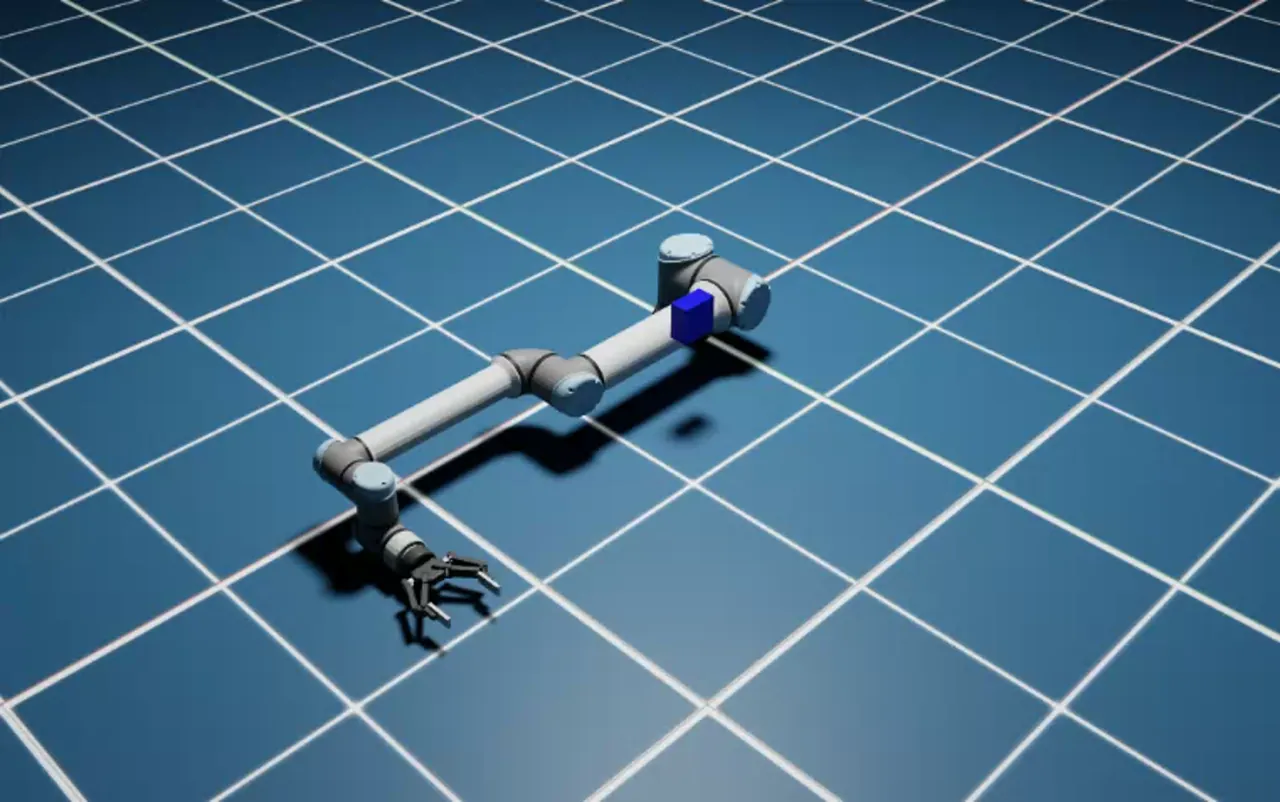
ステップ 5:基本的なピック&プレースタスク
最後に、ここまでのすべてを組み合わせて、物体を掴んで(ピック)別の場所に置く(プレース)タスクを実装します。
このステップでは 3 つのファイルを作成します:
controllers/pick_place.py— ピック&プレースコントローラtasks/pick_place.py— ピック&プレースタスクの定義pick_place_example.py— 実行スクリプト
5-1. ピック&プレースコントローラの作成
controllers/pick_place.py を作成します。このコントローラは、ステップ 4 で作成した RMPFlowController とグリッパー制御を組み合わせて、ピック&プレースの一連の動作を自動実行します。
import isaacsim.robot.manipulators.controllers as manipulators_controllers
from isaacsim.core.prims import SingleArticulation
from isaacsim.robot.manipulators.grippers import ParallelGripper
from .rmpflow import RMPFlowController
class PickPlaceController(manipulators_controllers.PickPlaceController):
def __init__(
self,
name: str,
gripper: ParallelGripper,
robot_articulation: SingleArticulation,
events_dt=None,
) -> None:
if events_dt is None:
events_dt = [0.005, 0.002, 1, 0.05, 0.0008, 0.005, 0.0008, 0.1, 0.0008, 0.008]
manipulators_controllers.PickPlaceController.__init__(
self,
name=name,
cspace_controller=RMPFlowController(
name=name + "_cspace_controller",
robot_articulation=robot_articulation,
),
gripper=gripper,
events_dt=events_dt,
end_effector_initial_height=0.6,
)
return
ポイント:
cspace_controller: ステップ 4 で作成したRMPFlowControllerをモーション制御エンジンとして使用しますevents_dt: ピック&プレースの各フェーズの時間配分を制御する配列です:
| インデックス | フェーズ | 説明 |
|---|---|---|
| 0 | 物体の上方へ移動 | エンドエフェクタをピック位置の上方に移動 |
| 1 | 下降 | ピック位置まで下降 |
| 2 | グリッパーを閉じる | 物体を把持 |
| 3 | 上昇 | 物体を持ち上げる |
| 4 | プレース位置の上方へ移動 | プレース位置の上方に移動 |
| 5 | 下降 | プレース位置まで下降 |
| 6 | グリッパーを開く | 物体を解放 |
| 7〜9 | 退避 | エンドエフェクタを安全な位置に退避 |
end_effector_initial_height: エンドエフェクタの初期高さ(0.6 メートル)。移動時にこの高さを維持します
5-2. ピック&プレースタスクの作成
tasks/pick_place.py を作成します:
import os
from typing import Optional
import isaacsim.core.api.tasks as tasks
import numpy as np
from isaacsim.core.utils.stage import add_reference_to_stage
from isaacsim.robot.manipulators.grippers import ParallelGripper
from isaacsim.robot.manipulators.manipulators import SingleManipulator
class PickPlace(tasks.PickPlace):
def __init__(
self,
name: str = "ur10e_pick_place",
cube_initial_position: Optional[np.ndarray] = None,
cube_initial_orientation: Optional[np.ndarray] = None,
target_position: Optional[np.ndarray] = None,
offset: Optional[np.ndarray] = None,
cube_size: Optional[np.ndarray] = np.array([0.0515, 0.0515, 0.0515]),
) -> None:
tasks.PickPlace.__init__(
self,
name=name,
cube_initial_position=cube_initial_position,
cube_initial_orientation=cube_initial_orientation,
target_position=target_position,
cube_size=cube_size,
offset=offset,
)
return
def set_robot(self) -> SingleManipulator:
asset_path = os.path.join(os.path.dirname(__file__), "..", "ur_gripper.usd")
add_reference_to_stage(usd_path=asset_path, prim_path="/ur10e")
gripper = ParallelGripper(
    end_effector_prim_path="/ur10e/ee_link/robotiq_140_base_link",
    # 既存アセットを利用する場合
    # end_effector_prim_path="/ur10e/ee_link/robotiq_arg2f_base_link",
    joint_prim_names=["finger_joint"],
    joint_opened_positions=np.array([0]),
    joint_closed_positions=np.array([40]),
    action_deltas=np.array([-40]),
    use_mimic_joints=True,
)
manipulator = SingleManipulator(
prim_path="/ur10e",
name="ur10_robot",
end_effector_prim_path="/ur10e/ee_link/robotiq_140_base_link",
# 既存アセットを利用する場合
# end_effector_prim_path="/ur10e/ee_link/robotiq_arg2f_base_link",
gripper=gripper,
position=np.array([0, 0, 0.5]),
)
return manipulator
cube_sizeのデフォルト値は[0.0515, 0.0515, 0.0515](約 5cm の立方体)です- タスクは自動的にシーンにキューブとターゲット位置のマーカーを配置します
5-3. ピック&プレーススクリプトの作成
pick_place_example.py を作成します:
from isaacsim import SimulationApp

simulation_app = SimulationApp({"headless": False})

import numpy as np
from controllers.pick_place import PickPlaceController
from isaacsim.core.api import World
from tasks.pick_place import PickPlace

# ワールドの初期化(物理ステップ 200Hz、レンダリング 10Hz)
my_world = World(
    stage_units_in_meters=1.0,
    physics_dt=1 / 200,
    rendering_dt=20 / 200,
)

# ターゲット位置の設定
target_position = np.array([-0.3, 0.6, 0])
target_position[2] = 0.0515 / 2.0  # キューブの高さの半分を Z 座標に設定

# ピック&プレースタスクの初期化
my_task = PickPlace(
    name="ur10e_pick_place",
    cube_initial_position=np.array([0.6, 0.3, 0.0515 / 2.0]),
    target_position=target_position,
    cube_size=np.array([0.0515, 0.0515, 0.1]),
)
my_world.add_task(my_task)
my_world.reset()

# ロボットとコントローラの初期化
task_params = my_world.get_task("ur10e_pick_place").get_params()
ur10e_name = task_params["robot_name"]["value"]
my_ur10e = my_world.scene.get_object(ur10e_name)

my_controller = PickPlaceController(
    name="controller",
    robot_articulation=my_ur10e,
    gripper=my_ur10e.gripper,
)
articulation_controller = my_ur10e.get_articulation_controller()

reset_needed = False

# シミュレーションループ
while simulation_app.is_running():
    my_world.step(render=True)
    if my_world.is_playing():
        if reset_needed:
            my_world.reset()
            reset_needed = False
            my_controller.reset()
        if my_world.current_time_step_index == 0:
            my_controller.reset()

        observations = my_world.get_observations()

        # ピック&プレースコントローラにオブザベーションを渡してアクションを計算
        actions = my_controller.forward(
            picking_position=observations[task_params["cube_name"]["value"]]["position"],
            placing_position=observations[task_params["cube_name"]["value"]]["target_position"],
            current_joint_positions=observations[task_params["robot_name"]["value"]][
                "joint_positions"
            ],
            end_effector_offset=np.array([0, 0, 0.20]),
        )

        if my_controller.is_done():
            print("done picking and placing")

        articulation_controller.apply_action(actions)

    if my_world.is_stopped():
        reset_needed = True

simulation_app.close()
5-4. 主要パラメータの解説
ワールドの設定
| パラメータ | 値 | 説明 |
|---|---|---|
physics_dt |
1/200(5ms) |
物理シミュレーションのタイムステップ。200Hz で物理演算を実行 |
rendering_dt |
20/200(100ms) |
レンダリングのタイムステップ。10Hz でレンダリング |
物理シミュレーションを高頻度(200Hz)で実行しつつ、レンダリングを低頻度(10Hz)に設定することで、シミュレーション精度を保ちながら計算負荷を軽減しています。
キューブのサイズ
キューブのサイズを [X, Y, Z] = [0.1, 0.0515, 0.1] メートルに設定しています。Y 方向を薄くすることで、グリッパーが把持しやすい形状にしています。
エンドエフェクタオフセット
エンドエフェクタのオフセットは、エンドエフェクタの座標系原点からグリッパーの把持点までのズレを補正するパラメータです。Z 方向に 0.20m のオフセットを設定しています。
end_effector_offset の調整が重要
end_effector_offset の値はグリッパーの形状やキューブのサイズに依存します。把持がうまくいかない場合は、この値を調整してください。値が大きすぎるとキューブの上方で把持を試み、小さすぎるとグリッパーがキューブに衝突します。
5-5. 実行と確認
スクリプトを実行すると、以下の一連の動作が自動的に実行されます:
- エンドエフェクタがキューブの上方に移動
- キューブの位置まで下降
- グリッパーが閉じてキューブを把持
- キューブを持ち上げる
- ターゲット位置の上方に移動
- ターゲット位置まで下降
- グリッパーが開いてキューブを解放
- エンドエフェクタが退避
すべての動作が完了すると、コンソールに done picking and placing と表示されます。
発展:より高度な実装について
このチュートリアルのピック&プレース実装は基本的なものです。以下の制限があります:
- 物体の位置をシミュレータから直接取得しているため、実ロボットにはそのまま適用できません
- キューブの形状に限定されたタスク設定です
実環境への応用や、より高度なマニピュレーションタスクには、Isaac Manipulator のドキュメントを参照してください。Foundation Pose による物体検出と組み合わせた、プロダクションレベルのピック&プレース実装が提供されています。
まとめ
このチュートリアルでは以下のトピックを扱いました:
- プロジェクトの準備:自作ディレクトリの構成と設定ファイルの配置
- グリッパー制御:
ParallelGripperクラスを使ったグリッパーの開閉制御 - IK ソルバーによるターゲット追従:
LulaKinematicsSolverを使った逆運動学によるエンドエフェクタの位置制御 - RMPFlow によるターゲット追従:障害物回避や関節制限を統合した
RMPFlowControllerによる滑らかなモーション生成 - ピック&プレースタスク:RMPFlow とグリッパー制御を組み合わせた物体のマニピュレーション
次のステップ
次のチュートリアル「閉ループ構造のリギング」に進み、高度なロボットリギング技法を学びましょう。